
Clouds over the Lea valley, London
In the last post we covered setting up a virtual machine in the cloud, logging into it via ssh and securing it. However, this gets us a virtual machine running in the cloud costing us money, it isn’t doing anything useful. To work with the virtual machine there are some other basic things that it’s helpful to be able to do.
1. Getting things on and off the cloud machine
2. Starting things running and leaving them
3. Running things at regular time intervals
Pre-existing knowledge of these activities with remote servers is implicit in many cloud discussions. A motivation for writing this is that I found that, unless one already has experience of this, this is not so obvious when encountering cloud computing for the first time which makes the area harder to learn.
What is covered here in the context of a virtual machine in the cloud also applies to any Linux computer that is being accessed remotely such as a Raspberry Pi on a local network (which also means that all of what follows could be learnt with a Pi rather than a virtual machine). There are other ways to do these actions, some of which are specific to a given cloud provider, but the following should work with any Linux based system.
1. Getting things on and off the machine
To do this we can use the Secure Copy Protocol (SCP) command which allows us to transfer files from the local computer to the machine in the cloud and vice versa.
SCP commands have a general form:
$ scp location_of_object_being_sent destination_it_is_being_sent_to
In what follows the commands below are run from the command line of the local machine. The cloud machine has an IP address (ip_address) and we have an account on it called ‘user’ i.e. user@ip_address.
Sending files to the virtual machine in the cloud
To send a folder/file to the cloud machine we run a command of the form:
$ scp -r -i private_key_filepath sent_item_filepath user@ip_address:filepath_cloud
Here the item we are sending is located at sent_item_filepath on the local machine and it is being sent to the destination filepath_cloud on the cloud machine. The path to the private ssh key that is used to do this is private_key_filepath.
The -r (which stands for recursive) is used to move folders and their contents, if it is a single file that is being moved then the -r flag can be omitted. The -i is included if we are using a particular ssh key, this and the keypath can also be omitted if you are using your default key.
Below is an example of sending a folder api_call_example to the cloud machine. Here we have set up a virtual machine with the user name cloud_user at the IP address 46.101.32.1 cloud_user@46.101.32.1 following the steps that we did in the first post. The folder we are copying to the cloud is in the same directory as the one we are running the command from. We are just copying the folder to the cloud machine’s home directory (The private key name here and what follows has been replaced with a generic label).

Getting files back from the cloud
To send a folder/file from the cloud machine to our local machine we just use the location of the file/folder on the cloud machine as the location of the item we want to send.
$ scp -r -i private_key_filepath user@ip_address:~/sent_item_filepath to_filepath
Here the item being sent from the cloud machine is located at sent_item_filepath and it is being sent to the location to_filepath.
Below is an example of getting a folder called results off the cloud machine.

2. Starting things running and leaving them
We are logging into the virtual machine using ssh, however this has a limitation that if something is running we may want to log out of the virtual machine (or perhaps ssh ends accidentally as we forget about it and close the laptop, we lose wifi etc) then the ssh session ends and stops the programme running. We therefore need a way to keep the programme running when this happens. One of the ways to do this is the Screen programme.
In the following (unless stated otherwise) the commands are run from the command line of the virtual machine which we have logged into using ssh along the lines of the first post.
We show a specific example of the steps worked through for the virtual machine in the cloud cloud_user@46.101.32.1 (cloud_user@test-virtual-machine) running a programme (it’s calling the Twitter API)
which we transferred with SCP earlier.
1. From the command line install screen if not already installed. To do this it will prompt for the user password as we set up in the first post.
$ sudo apt-get install screen
2. Starting a screen session, starting the programme and logging out.
To start a screen session which we’ll call api_call, we run the following:
$ screen -S api_call
This will then take us into a new view of the virtual machine which is within the screen session we have just started. We then start the programme running.
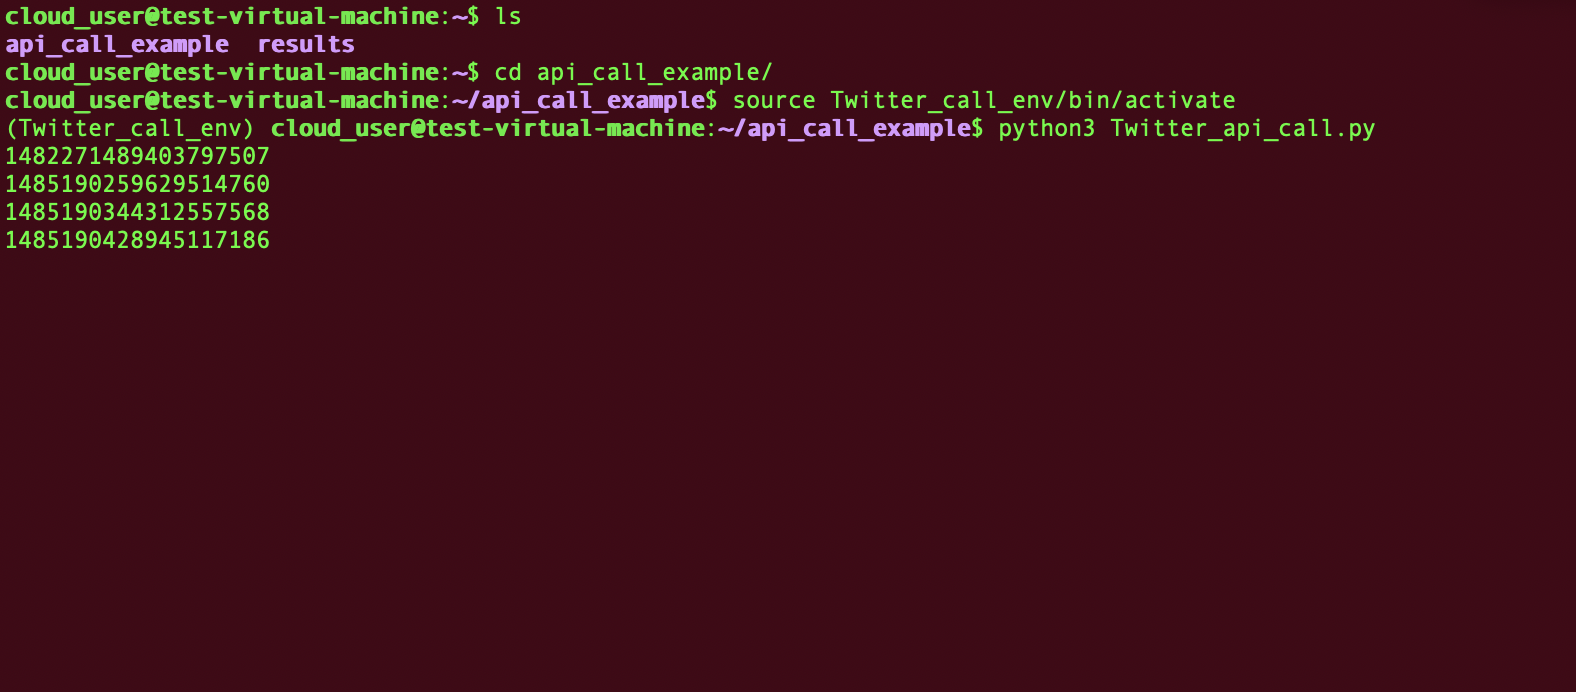
The screenshot below shows an example of this. Within the screen session we move to the folder api_call_example activate a virtual environment Twitter_call_env and then run a python programme Twitter_api_call.py. This programme is collecting
data from the Twitter API and is printing the id of the last Tweet collected in a given API call to the screen. These are the numbers scrolling down the screen.
Then log out of/detach from the session typing crtl and a together Ctrl+a and then typing d. You can now work on something else in the virtual machine/log out etc and the programme will keep running in the background in the screen session.
3. To get back into the session from the command line of the home machine
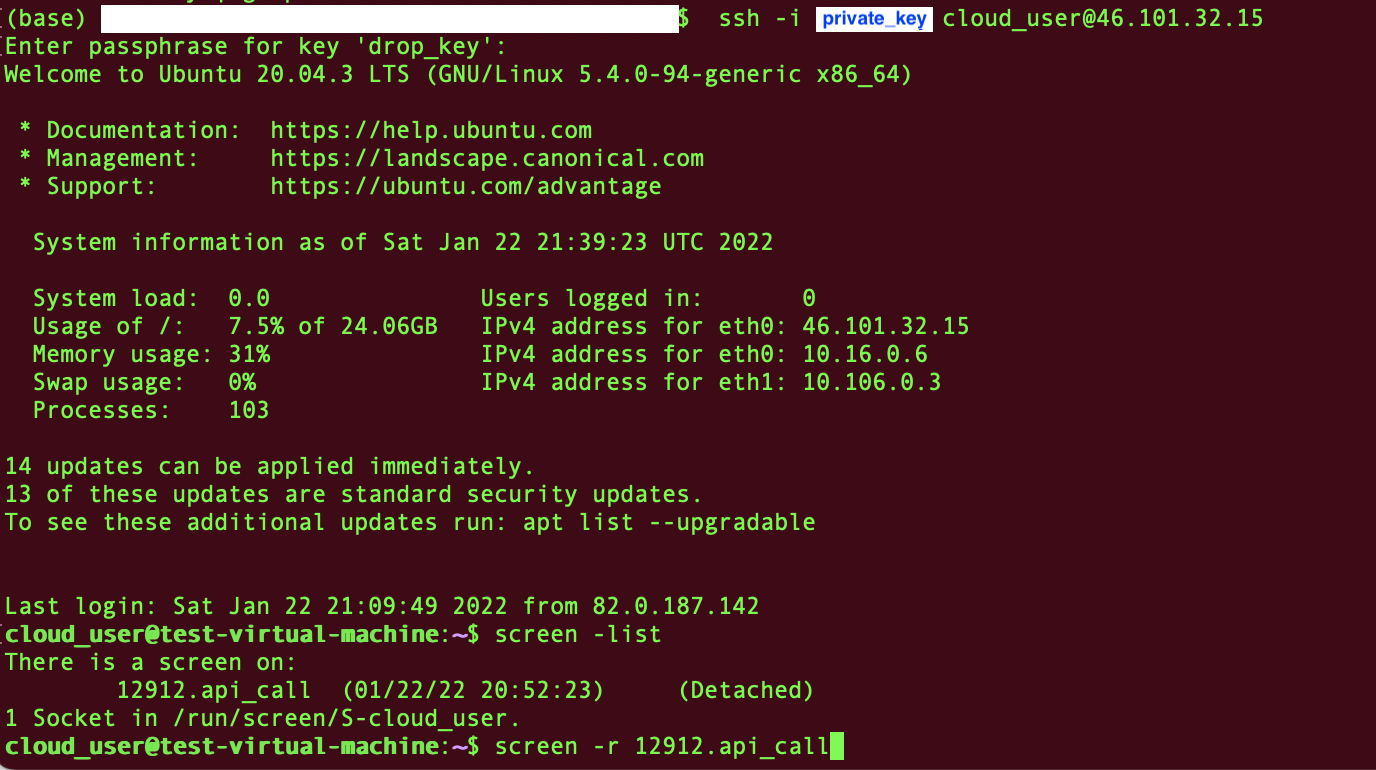
Assuming we have logged out of the machine, to get back in:
$ ssh -i /path/to/private_key user@ip_address and input the ssh key password
$ screen -list To list the screen sessions that have been left running
$ screen -r screen_session_id and return will take you back into the session that is running the programme. In this case $ screen -r 12912.api_call.
The screen shot below shows an example of this (Some computer specific information has been removed)
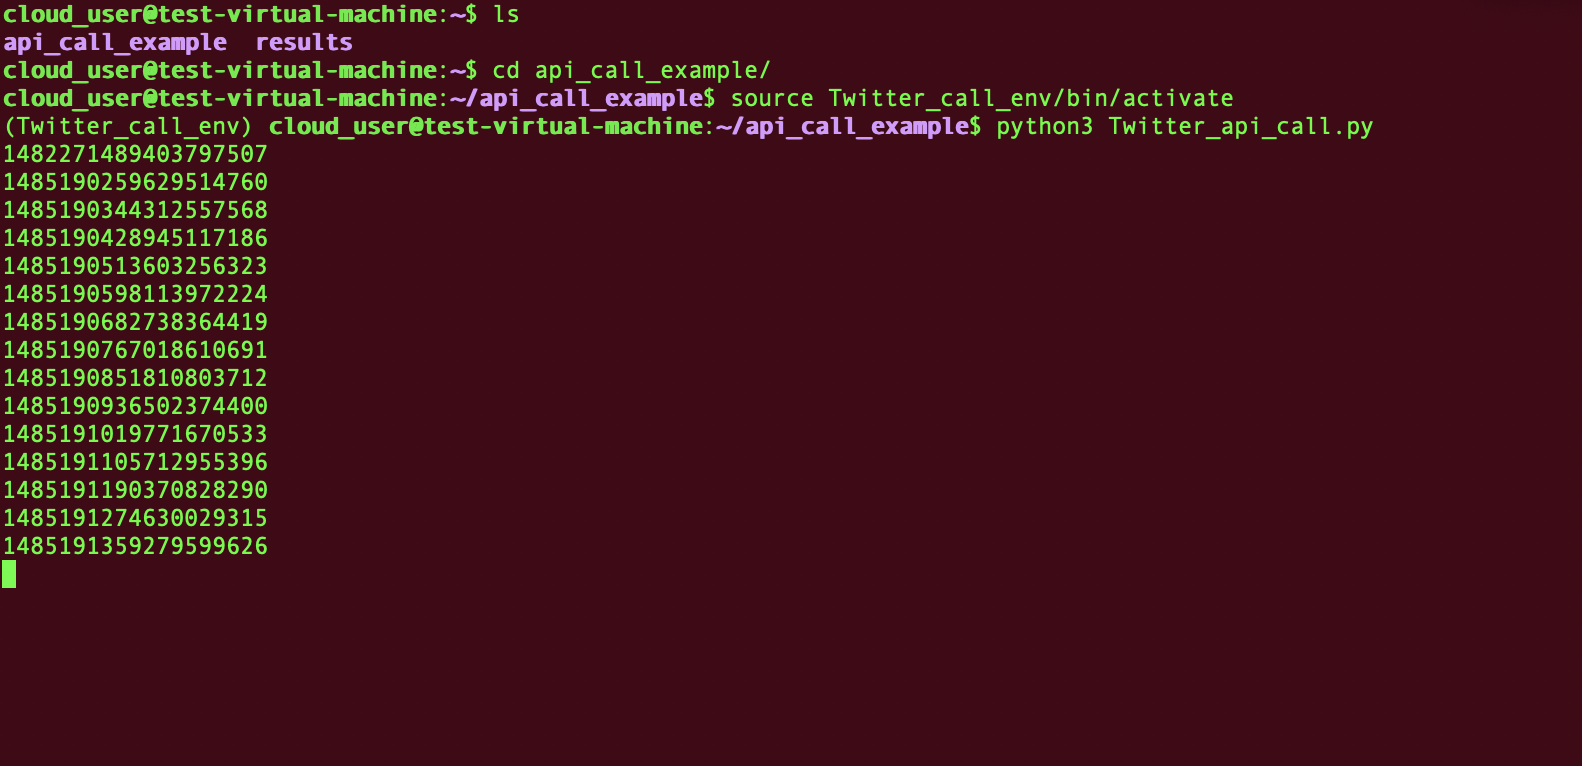
 This will take you back into the session and you can see the programme has made a few more API calls since we last logged out.
4. Ending a sesssion permanently
If you want to end the screen session type ctrl and a together Ctrl+a and then :quit will end the session.
3. Running things at regular time intervals
In the previous example we started a programme and left it running in the virtual machine. However, perhaps we want to run something, a web scraper for example, on the cloud machine at regular intervals, such as once a day at a certain time. There is a standard way to do this on Linux machines known as Cronjobs. Every Linux machine holds a user defined list (the crontab) of the location of programmes and how often they should be run (the cronjobs).
1. Accessing the crontab
To edit the crontab type the below, if you just want to see it swap the -e for -l.
$ crontab -e
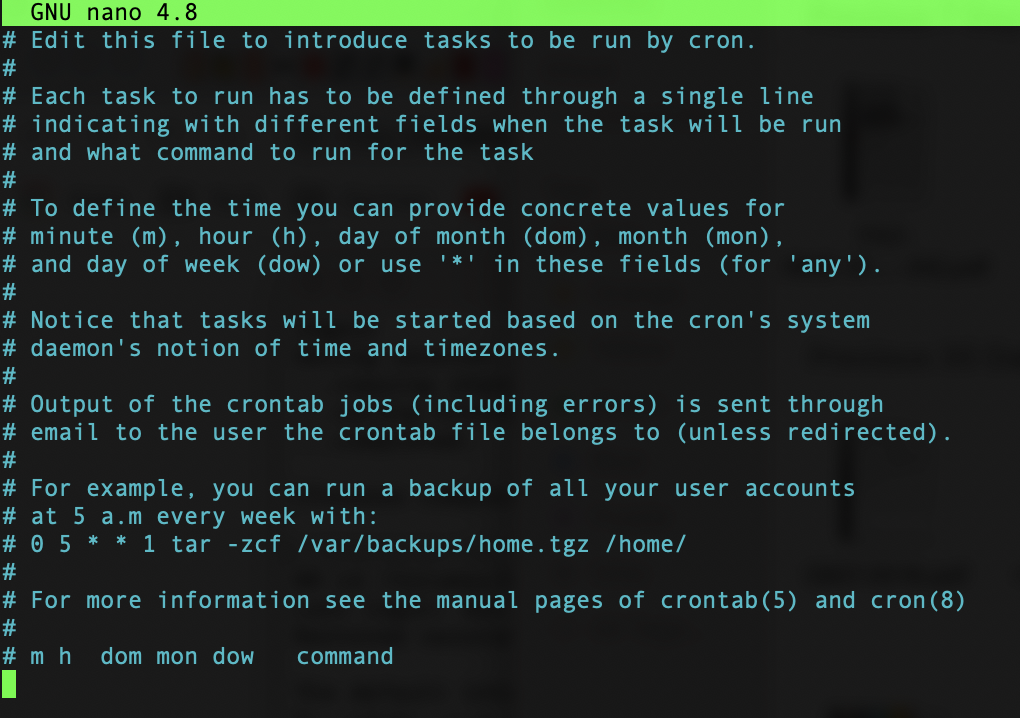
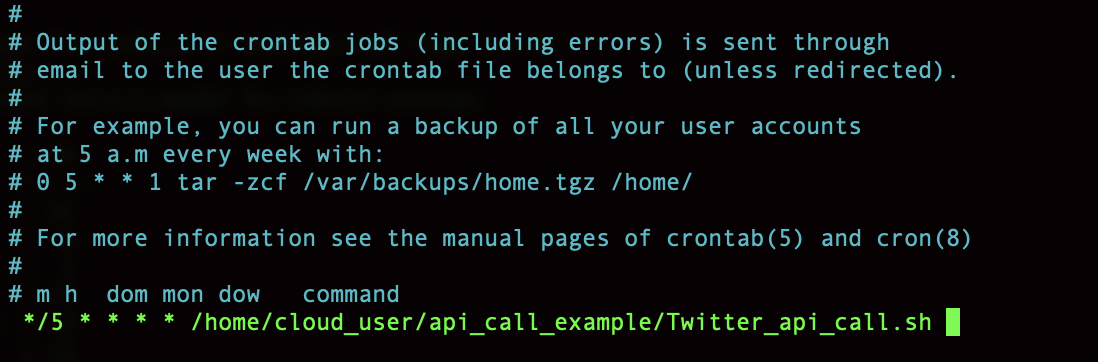
If starting on a new virtual machine there won’t be a crontab set up, so when you type the above you will get a prompt to choose a text editor to edit the crontab (In this example I chose nano) and it will then show you the crontab below.
2. Writing a cronjob
Cronjobs have a particular format shown below:
***** /path/to/script_being run
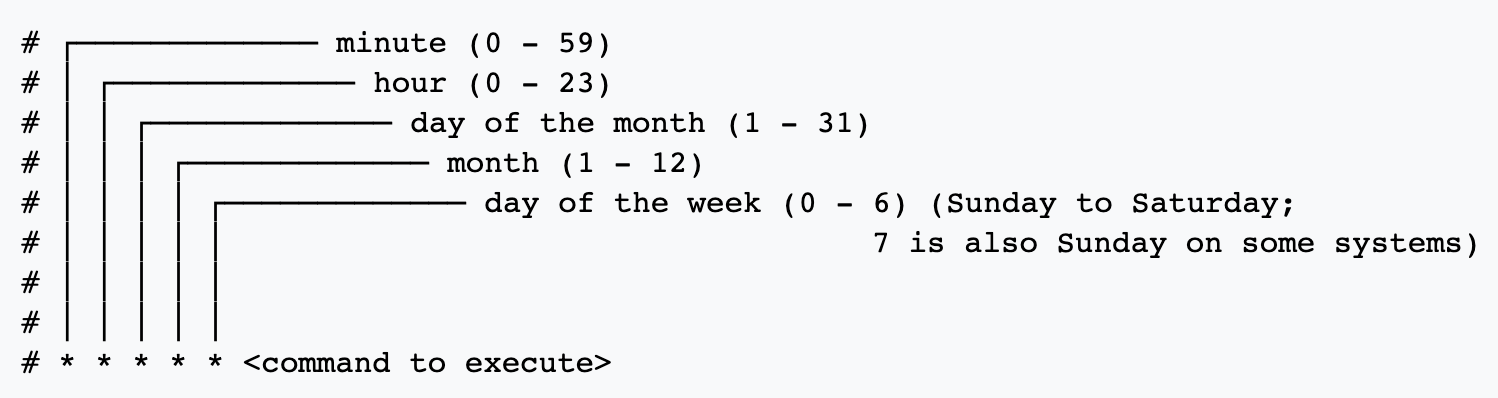 Source: https://en.wikipedia.org/wiki/Cron
The order of times is Minute, Hour, Day of Month, Month of Year, Day of week. A star means that the programme is run for every change in the unit of time the position corresponds to, thus ***** would run a programme every minute of every day of every month of every year, in short - every minute.
Some cron examples:
Every Monday at 3pm: 0 15 * * 0
Every day at 4.30 pm: 30 16 * * *
Every first day of month at 12 noon:0 12 1 * *
Every 15 minutes: */15 * * * * The / makes the event happen at intervals.
These can be formatted with or without spaces between the items (here with spaces). Tools like crontab generator can help generate the desired time frequency.
In the example above the API call was being run at frequent intervals by the python programme. For the purposes of demonstrating a cronjob we will disable that functionality so that
the programme makes just one API call and the stops. We will write a cronjob that runs the programme and makes an API call every 5 minutes to do this */5****.
We package the activation of the virtual environment, the running of the python API call and then deactivating the virtual environment into a shell script that the operating system runs using the cronjobs.
We create the script called Twitter_api_call.sh:
nano Twitter_api_call.sh
To this script we add:
#!/bin/bash
# Activate the virtual environment
source /home/cloud_user/api_call_example/Twitter_call_env/bin/activate
# Run the python script
/usr/bin/python3 /home/cloud_user/api_call_example/Twitter_api_call.py
# Deactivate the virtual environment
deactivate
We change the permissions to make the script executable
$ chmod u+x Twitter_api_call.sh
and then open the crontab with $ crontab -e and add the cronjob. Here we are running the programme every 5 minutes.
3. Check when the jobs have been run by searching syslog
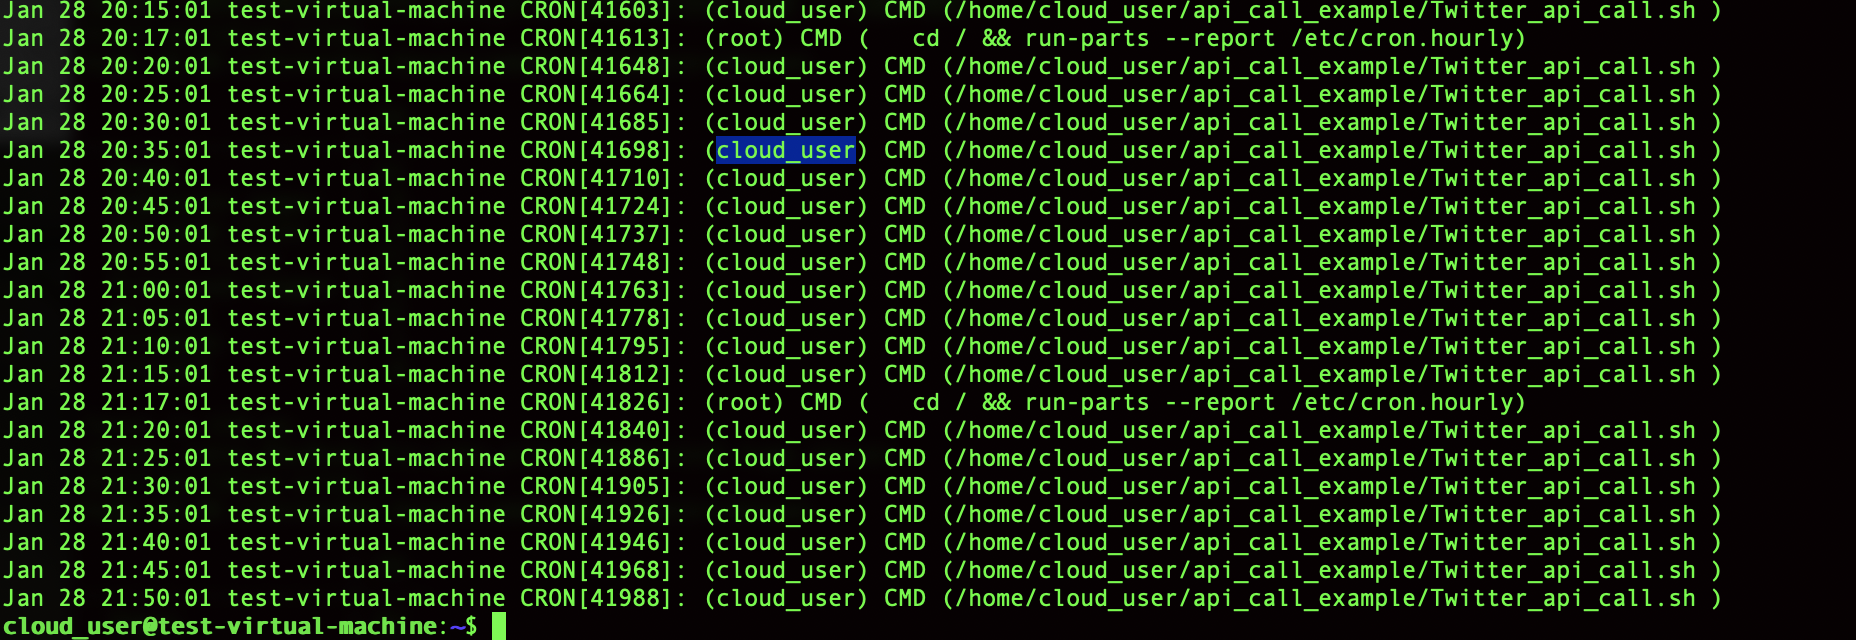
To see that the cronjob is running access the log for cron with the command below:
$ sudo grep CRON /var/log/syslog
You will be prompted for the user password that you set up with the virtual machine (see first post).
This will show the job in our example running every 5 minutes (and other internal crons) running.
Cronjobs run in the background. This means we can log out and they will keep running - no need to use Screen.
This also means that the Twitter ids we were printing to the screen in the previous example won’t be visible,
but we can redirect them to a text file and read them there. Changing the line in the shell script to the below will print
the Twitter ids to the text file output_file.txt in the same folder.
/usr/bin/python3 /home/cloud_user/api_call_example/Twitter_api_call.py >> output_file.txt
These are just a few things that I found helpful getting started with the cloud. If there is anything that you think it would be useful to cover please let me know.
The warning no cloud tutorial is without Running a virtual machine in the cloud costs money. It is important to know how much things are costing, track the billing and turn things off if no longer needed to avoid unpleasant surprises.
Previous cloud posts:
Cloud 1: Introduction to launching a Virtual Machine in the Cloud
Cloud 2: Getting started with using a Virtual Machine in the Cloud
Cloud 3: Docker and Jupyter notebooks in the Cloud
Cloud 5: Introduction to deploying an app with simple CI/CD
Cloud 6: Introduction to Infrastructure as Code using CloudFormation
Cloud 7: Building an API with Lambda, Docker and CloudFormation
Cloud 8: Automating publishing an Android app to Google Play with GitHub Actions